

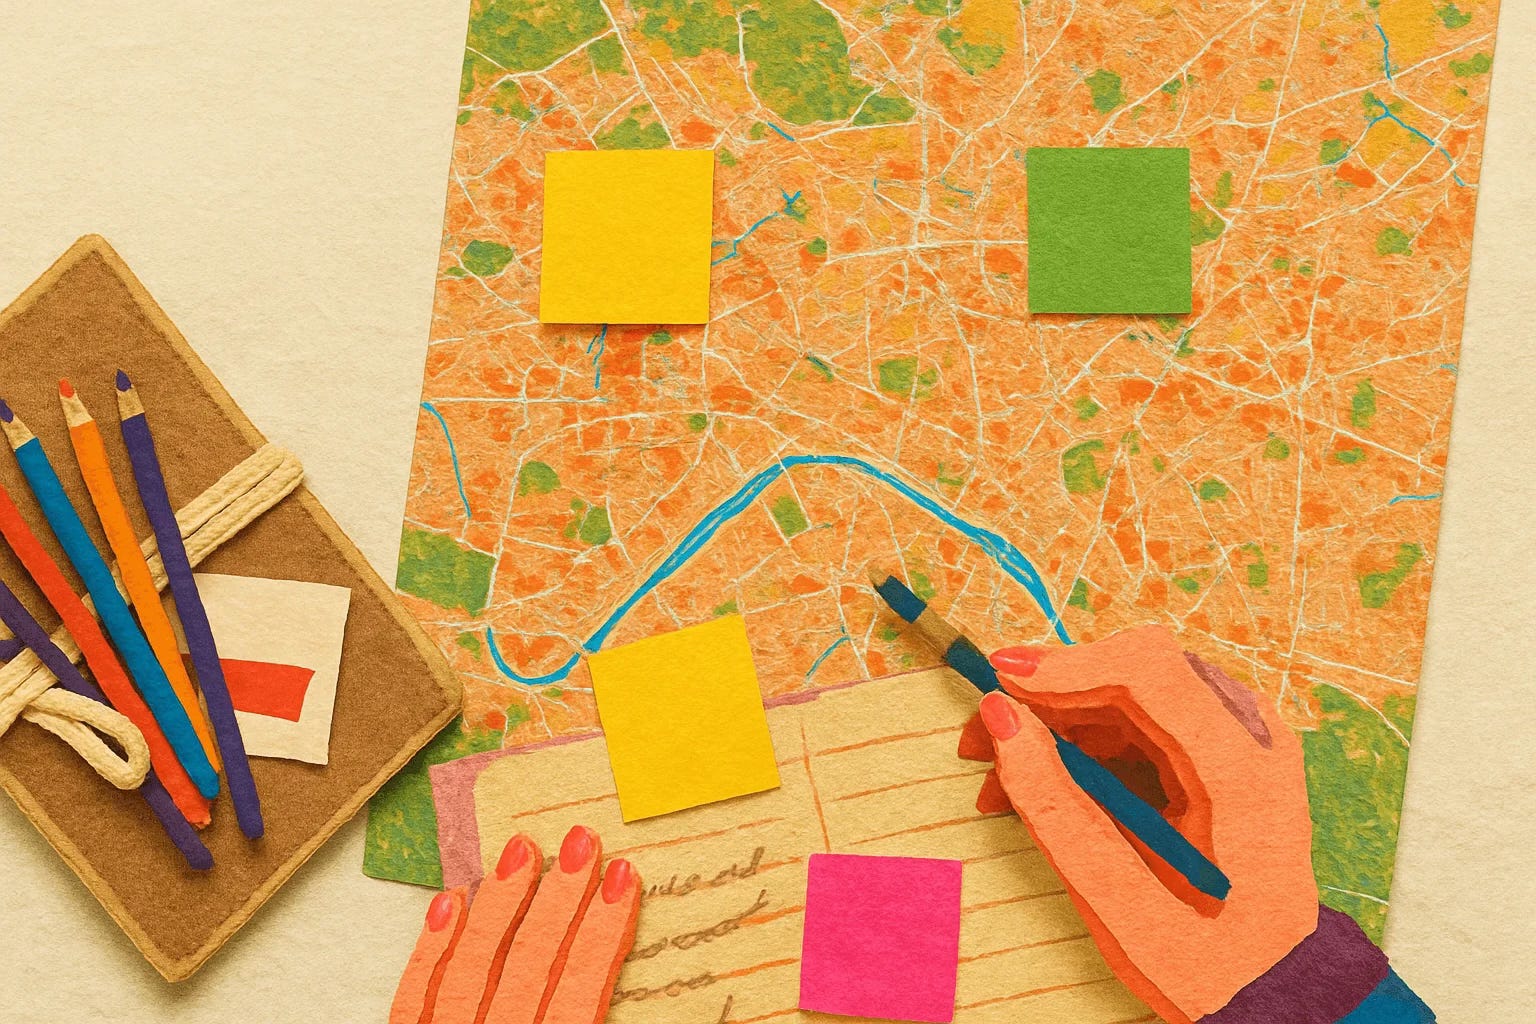
How to create a storymap: the basic principles to improve your backlog
Story mapping is a method for organizing user stories, enabling a holistic view of the entire experience.
What is story mapping?
Story mapping is a method for organizing user stories and allows for a more holistic view of the entire experience and process. And yes, it is also a method that can be proposed, used, or facilitated by designers.
I've used this method when working in product teams that mostly follow agile methodology and where maturity is low and they need some guidance.
This is because it forces and educates teams to write user stories correctly, focusing more on users and less on solutions or technical limitations.
At the end of a Story Mapping session you should have:
A holistic view of the product (backlog)
Features broken down into user stories
User stories broken down into technical tasks
Benefits
Story mapping can be used at various moments in your project, for example during sprint planning. It should be a living document and updated as needed.
Story mapping promotes the product vision
Technical teams can access a view of future work
Easier to map everything (visually) and decide what the MVP will be for the first release.
Who should be present in this workshop?
User Experience teams
Development teams
Product owner / manager
Scrum master
How to do a story mapping
It's important to remember that Story mapping should represent user tasks in a narrative way.
Also remember that a user story should represent an intention and goal rather than a feature. We'll talk about user stories in another article…
Don't focus on technical complexity, but rather on the user's tasks.
It's important that the people involved know all the steps of the process so they feel comfortable participating.
I've done this type of workshop with developers who would start to panic if we didn't talk about technical tasks or features. In this case, tell them that we will get to the technical tasks in time, but it's important to start with tasks from the user's perspective.
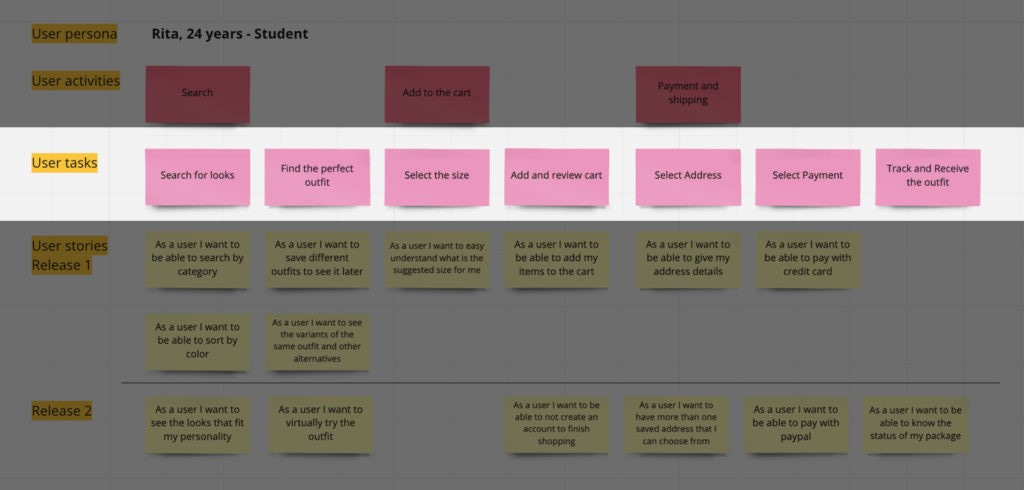
First, let's define our persona and describe their tasks in their journey.
To make it easier, and if something already exists, you can place that task as a central point and fill in the user tasks that happen before and after that moment.
Don't forget to write tasks in narrative form and correctly define the persona.
Map tasks into activities
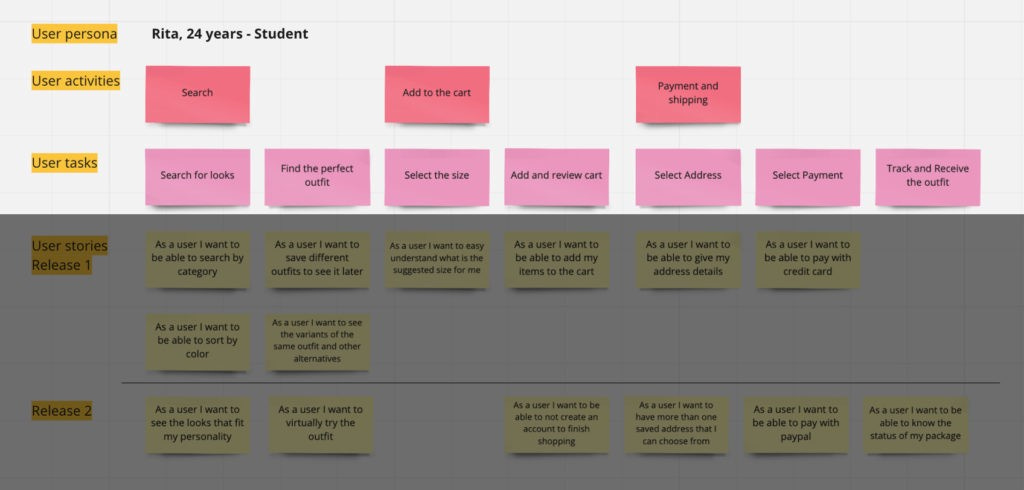
Now that you have the user's tasks, you can categorize or organize them into activities. In the future, these can become the epics used in product management.
Create the user stories
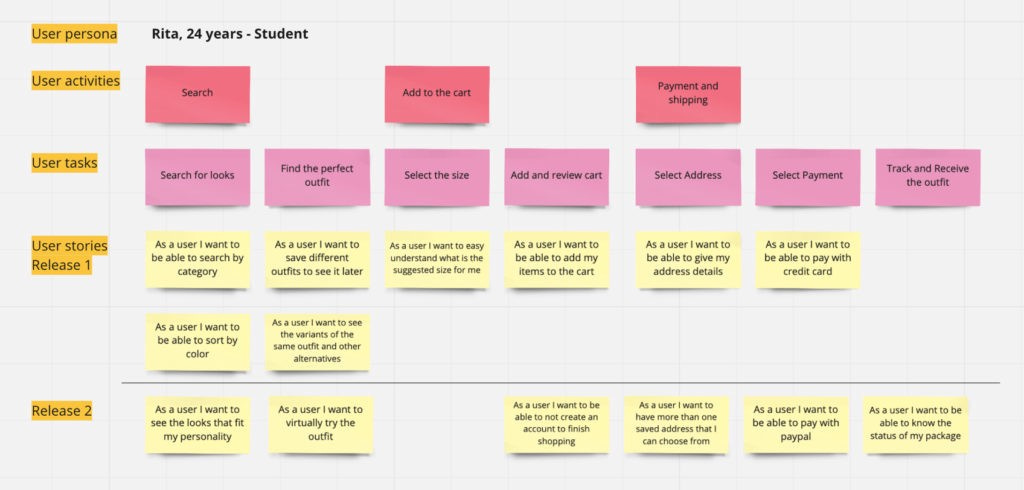
At this point you have the base of your map and we are going to start creating user tasks in greater detail. Always from the user's perspective.
The best way to create user stories is to use the most well-known format:
"As a [persona], I want to [what]. [so that]."
This would result in something like: "As Sarah, I want to organize my work, so that I can manage my team's tasks."
Define priorities and what will be in the next release
It should now be possible to prioritize user stories. You can help the Product Manager divide them into releases. This prioritization typically involves the effort of each user story and its importance to users.
This mapping allows you to understand what will be delivered over time and the value each release brings.
Priorities can always be changed later, especially after understanding the technical difficulty of each user story.
Break each user story into technical tasks
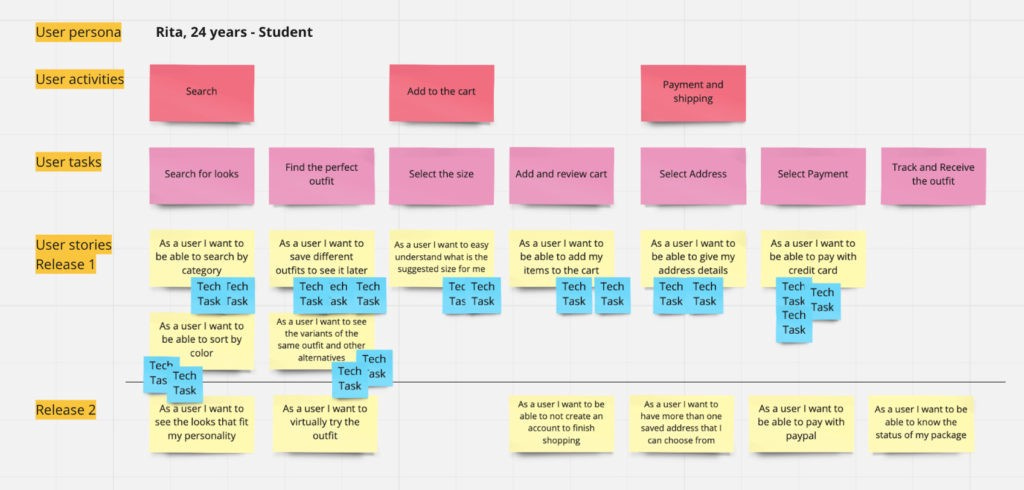
In the final phase of this workshop we should break down user stories into technical tasks. These should allow the development teams to understand what tasks need to be done in order to support each user task. This approach also allows for a better method of estimating and prioritizing technical work according to user value.
Thank you for reading the UX Snack Newsletter. Subscribe to receive new articles and support my work!
I've tried to summarize this activity as much as possible. You can find more information here: